
With all the superhero TV shows and movies coming up, why not do something related to it. Get ready everyone and let’s suit up!
(This tutorial is based on this youtube video by Photoshop Tutorial with a bit of twist. So I won’t be following completely by the video instructions.)
1.Open up the image in Photoshop

2. Filter Gallery
- Unlock the background layer and rename it filter gallery.
- Select filter > filter gallery. I skipped the quick selection, refine edge part and went straight to filter gallery.

 Filter Gallery” width=”1366″ height=”726″>
This part is where the fun begins. You get to experiment however you wish. You need not completely follow the numbers that I put in for poster edges and cutout. Just remember as long as you are happy with how it looks, then go for it.
In the artistic tab, select poster edge. For those who want to follow the values, it’s as shown below:

Then create new effect layer.

Select cutout in the artistic tab. The values are shown below for those who want to know the values I used. Once done, click ok.

3. Diffuse
With the filter gallery selected:
- Ctrl + J (Windows) or Command + J (Mac) to duplicate the filter gallery layer.
- Rename the copy layer, diffuse.
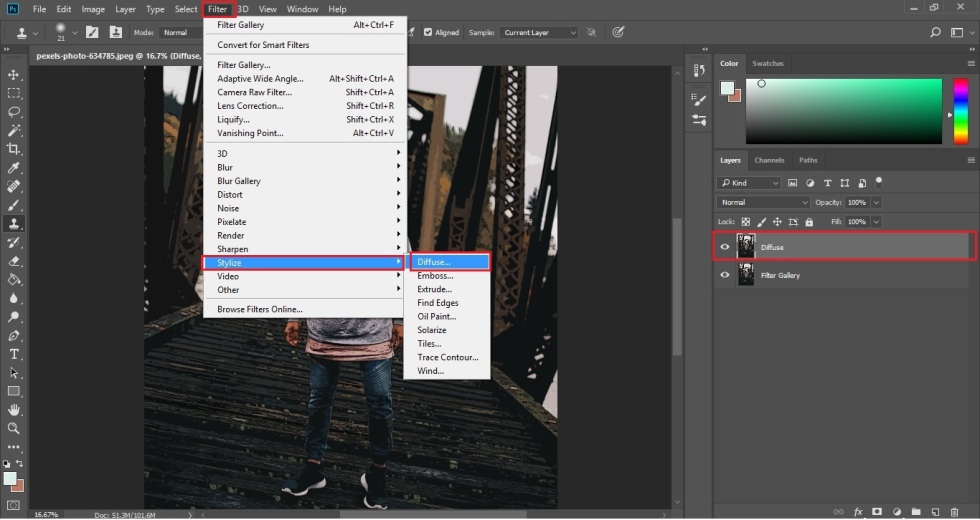
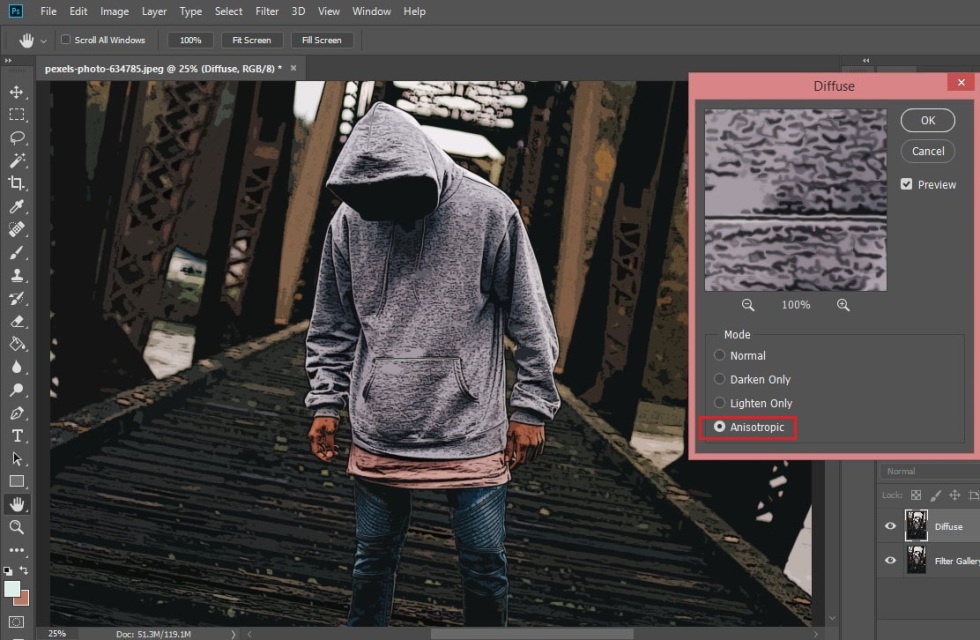
- With the diffuse layer selected, click on Filter > Stylise > Diffuse
- Check the anisotropic option and click ok.
 Stylise > Diffuse” width=”1366″ height=”726″>
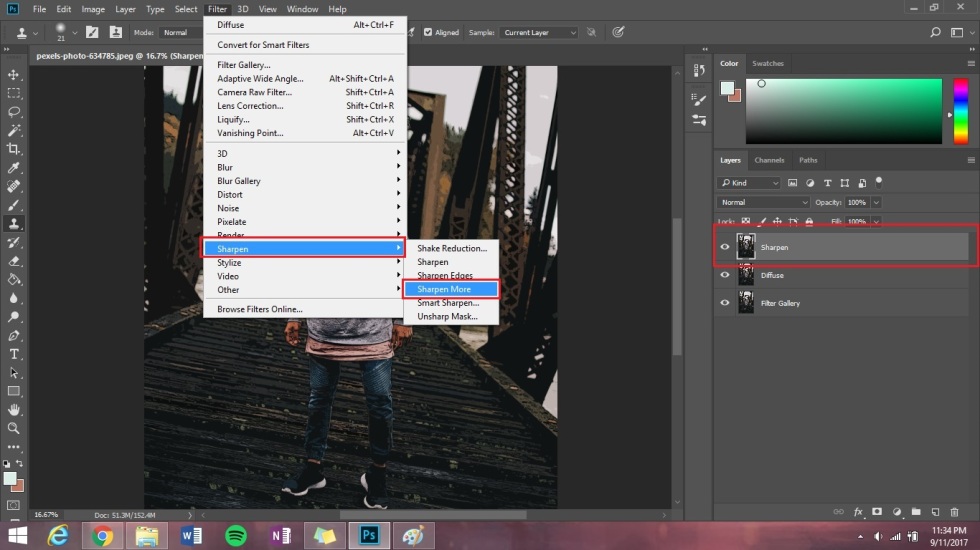
4. Sharpen
With the diffuse layer selected:
- Duplicate the diffuse layer
- Rename it sharpen.
- With the sharpen layer selected, click on filter >sharpen > sharpen more
 Sharpen > Sharpen More” width=”1366″ height=”768″>
5. Halftone
With the sharpen layer selected:
- Duplicate the layer
- Rename it to halftone.
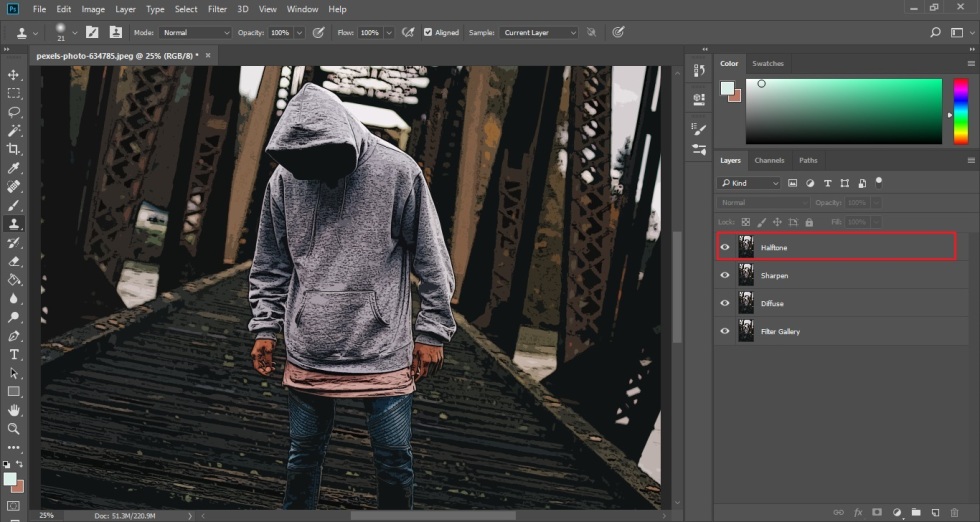
- Right-click & select convert to smart object
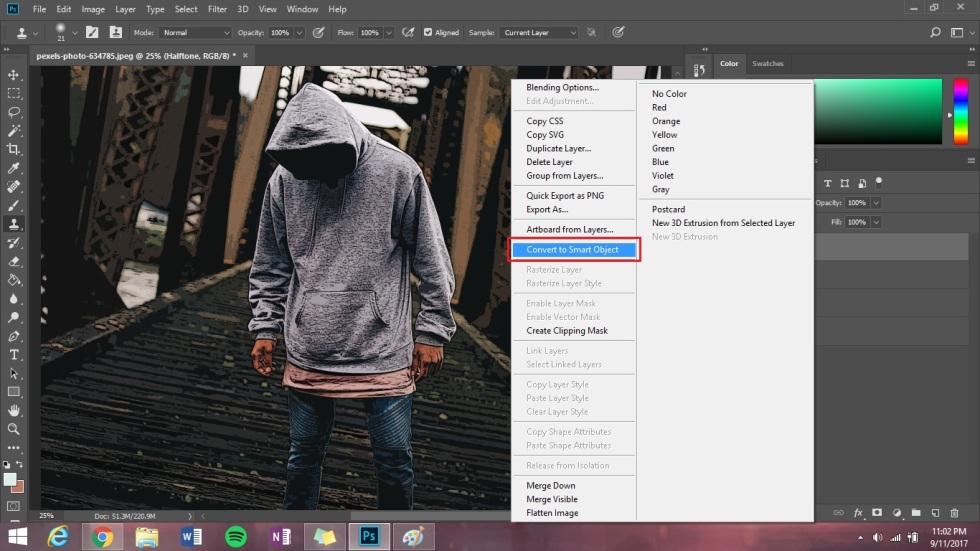
- With the colour halftone layer selected, select filter > Pixelate > Colour Halftone
![]() Pixelate > Colour Halftone” width=”1366″ height=”728″>
Pixelate > Colour Halftone” width=”1366″ height=”728″>
- Put 8 on the radius option. Leave the rest as it is. Once done, click ok.

6. Change blending mode & layer opacity
- Change blending mode: soft light
- Enter 30% at the layer opacity

7. Merge all layers
- With the top layer selected, press ctrl + shift + alt + E (windows) or shift + command + option + E (mac)
- Rename the new layer to merged

8. Add in Stroke
- Select the merged layer and click on fx > blending options
- Click on stroke option change the size to 73 and colour to white.


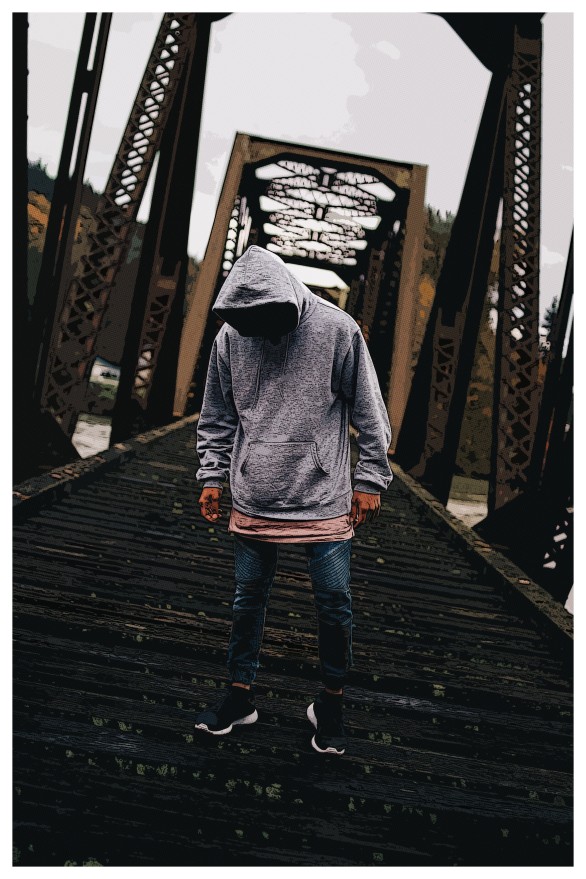 Final Result!


And here’s a comparison of the before and after!
There you have it! Pretty simple isn’t it? Yay! Now we have a new skill to show off to our friends. This effect is fun to play with and it’s great to do as a gift to let them know that they super special in your life.
‘Till next time!
You must be logged in to post a comment.