Have you guys ever wondered how to make a certain colour stand out in a picture? In today’s tried and tested blogpost, we will be trying that. It is also called the colour splash effect. The only thing you need is Photoshop.
Let’s start!
First, open the picture you would like to edit in Photoshop.
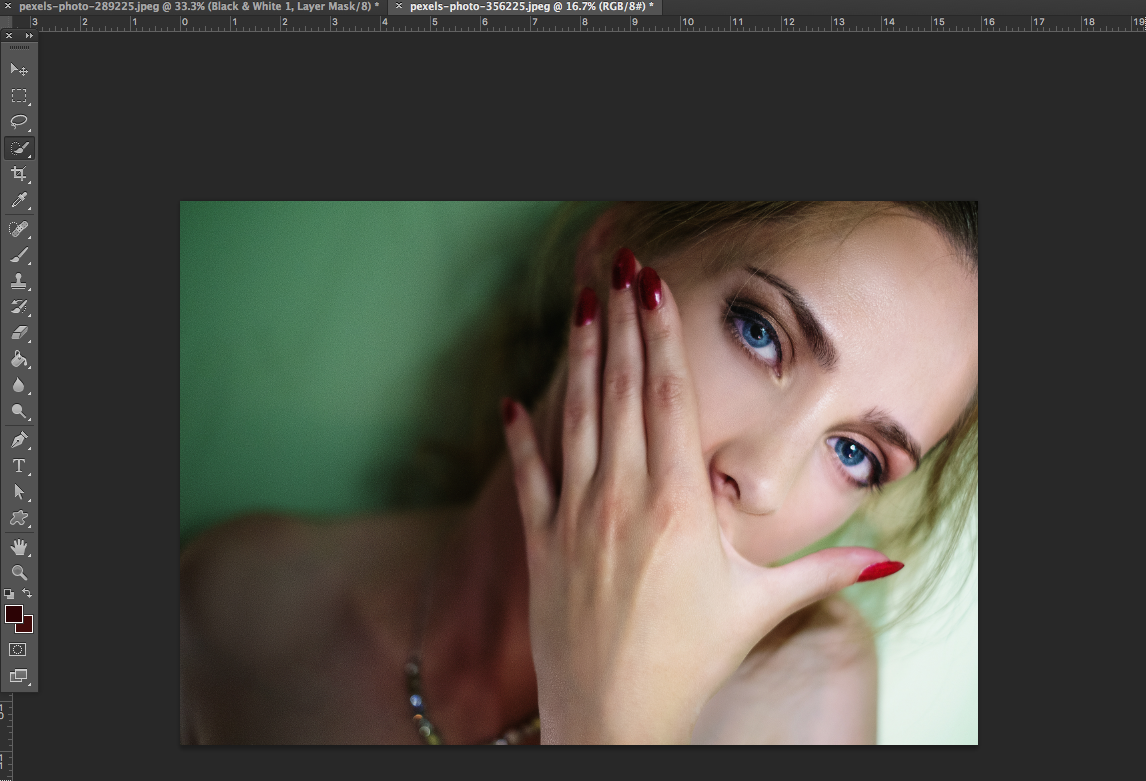
Then click on select – colour range.

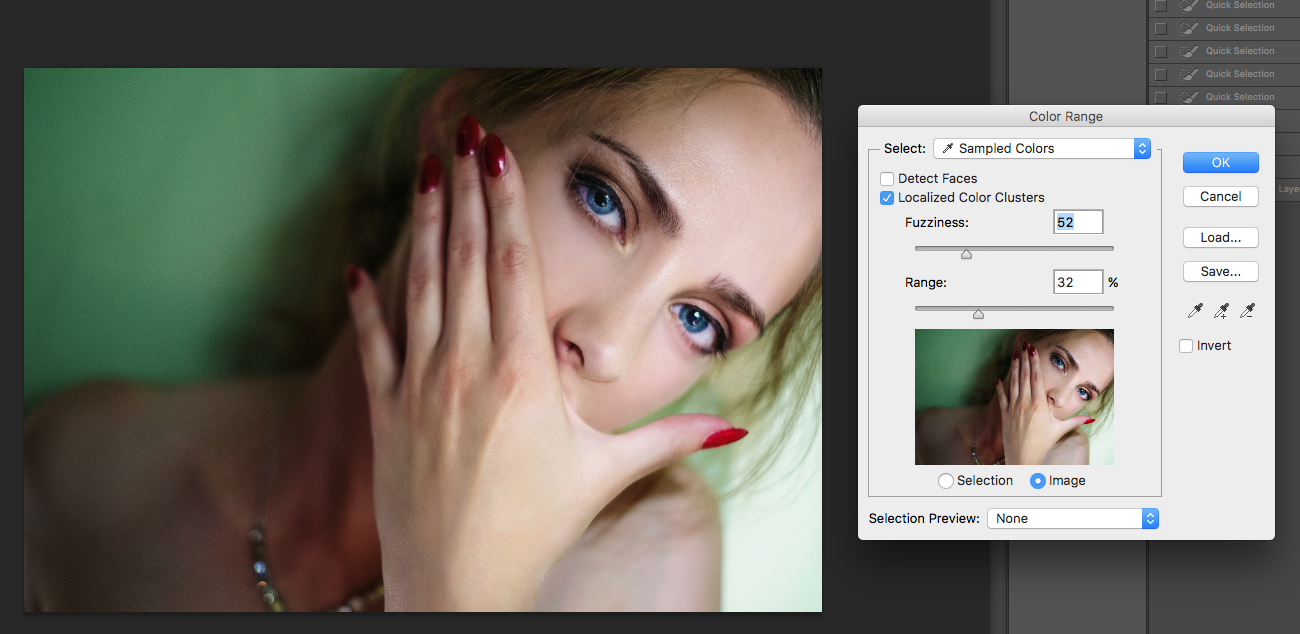
Next, select sampled colours and localised colour clusters. Click on the dropper icon. Then click onto the colour you want to retain in the image. For me, I chose red.
![]()
To check on the selection of the colour, make changes to the options as shown below. If you want to see the image, change the selection preview and select none.
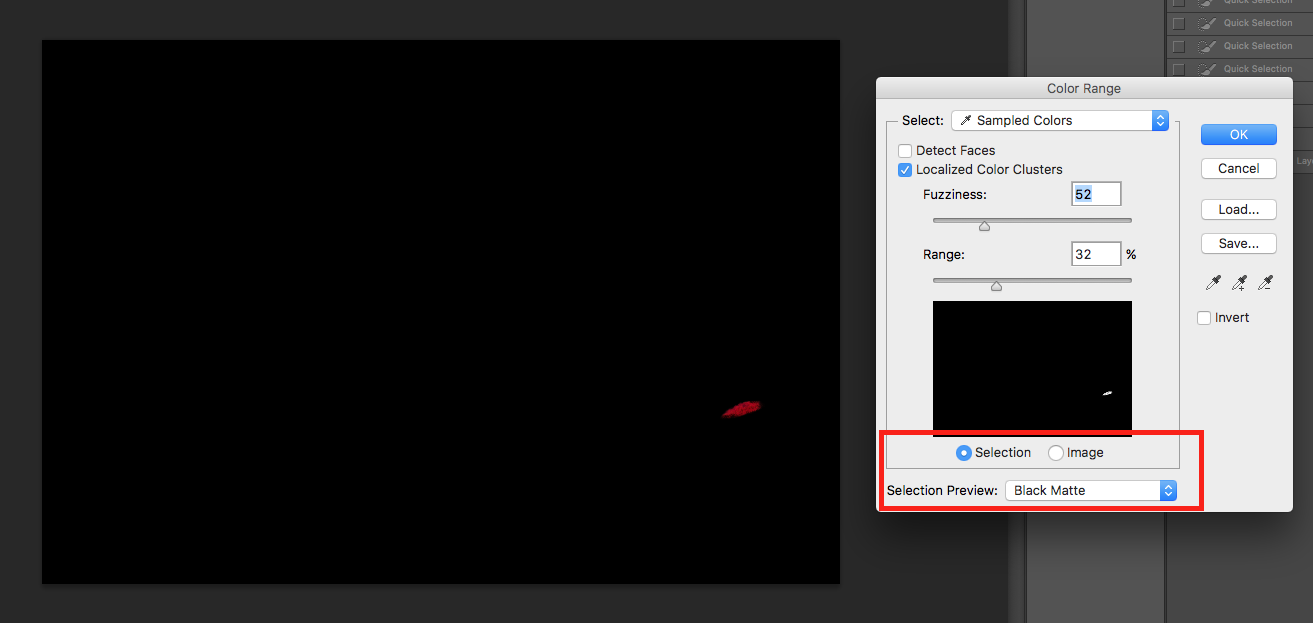
I want to add more of the sampled colours, so choose the dropper with the ‘+’ icon to add more to the selection. If a colour was accidentally added, choose the dropper with the ‘-‘ and select the colour that got added.
![]()
![]()
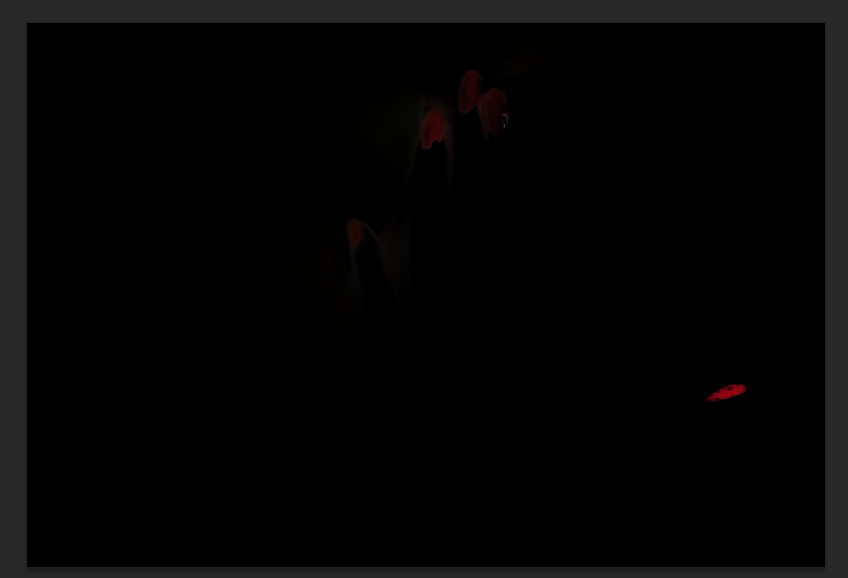
Once done, it should look like this:
Select invert and then press OK. This should happen.


We are almost done so hang in there. Select Layer – New adjustment layer – black & white.
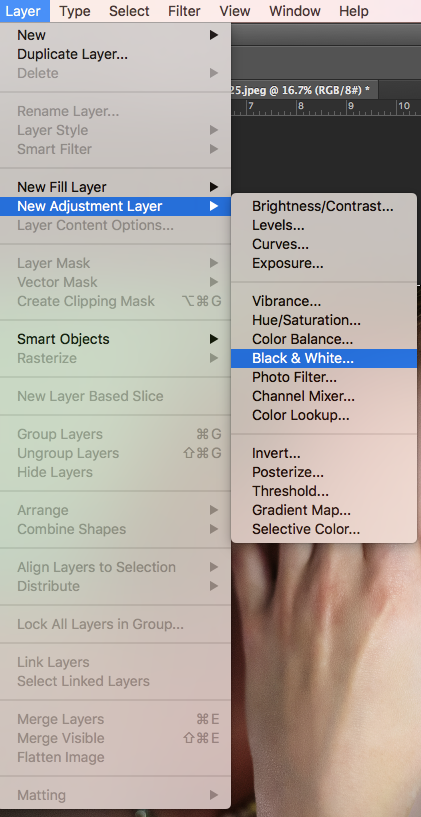
This would appear. Select OK.

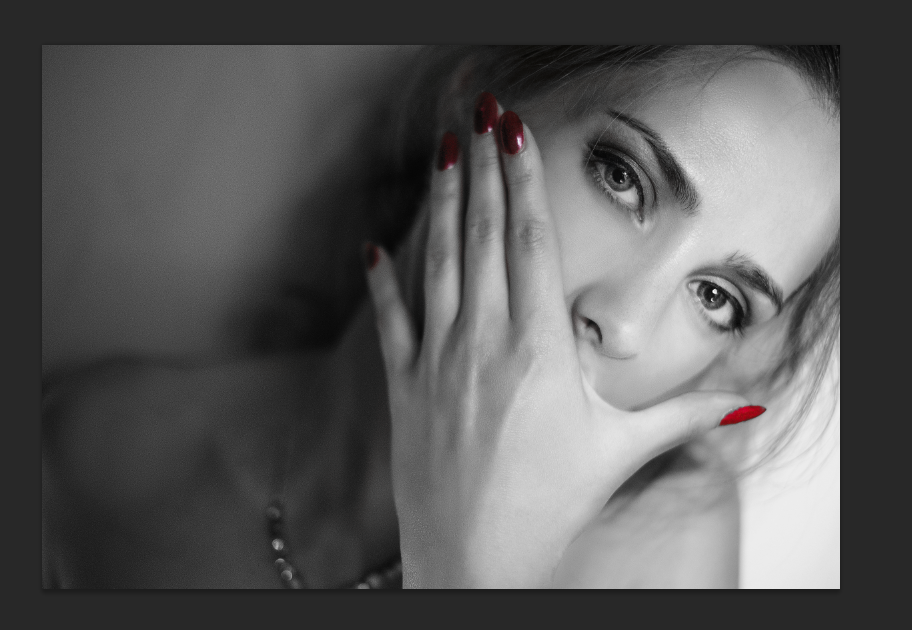
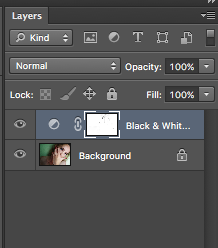
The image will turn out like this and an additional adjustment layer will appear on the layer bar. And there you have it! A colour splash effect. It took me a few tries before getting to this result. So just keep on trying and experimenting.
Here are some inspiration on what you could do with colour splash effect:


So that’s it, folks! It may take awhile to get the hang of it but keep trying and you would definitely like the results that you get in the end.
‘Till next time!
You must be logged in to post a comment.